creative play · paper weaving · screen free activities
Paper-Strip Weaving: A Small Creative-Play Invitation
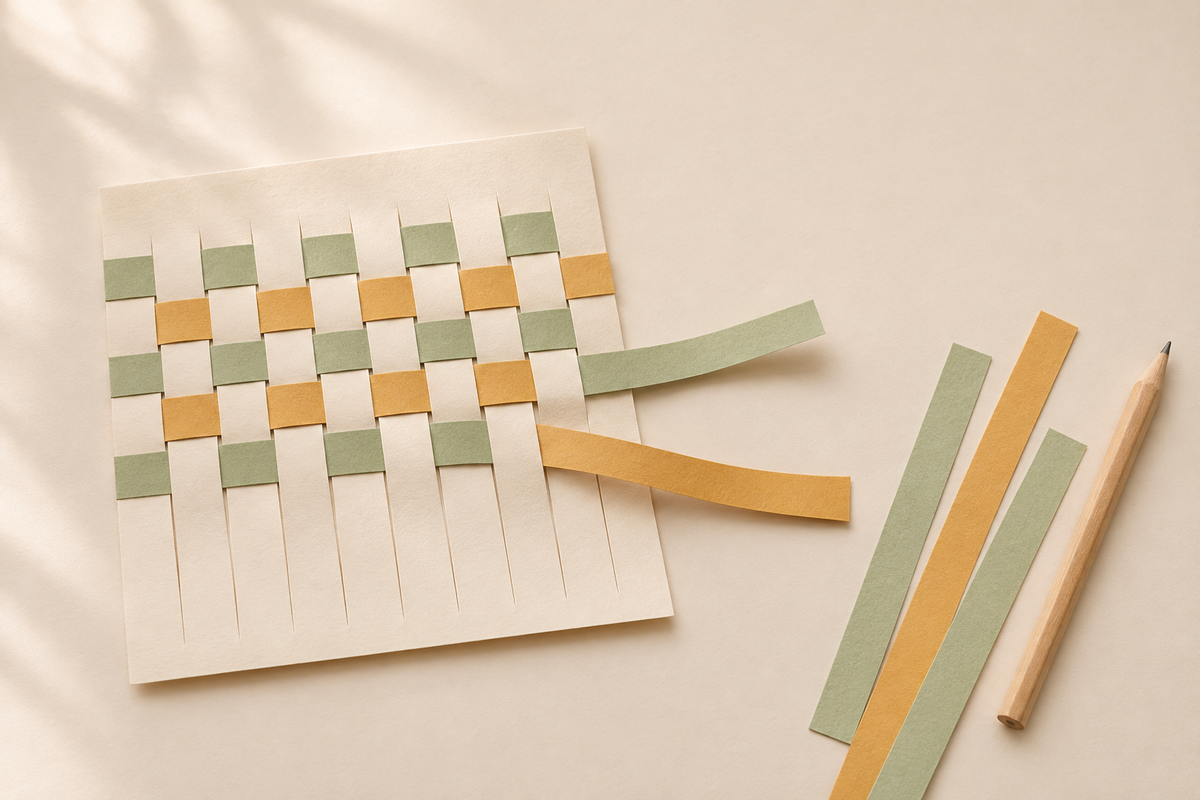
A few strips of paper can become a small weaving, a path of colours or simply an invitation to explore. This activity starts with a prepared paper base and leaves the choices open: which strip to try, where it goes and when the piece feels finished. The illustrated setup is an activity example, not a page from a book or a child's finished work.
Set out a small, manageable invitation
Use ordinary paper, a second sheet in another colour and a clear place to work. A pencil and scissors are useful for preparing the materials. An adult can do all the cutting beforehand. Keep scissors and scraps out of reach when they are not being used, and supervise according to the child's needs. Choose large pieces rather than tiny loose decorations.
Start with only a few strips. Too many colours or a large pile of materials can make the first decision harder. You can always offer another strip later. A finished example is optional; it should not become a result the child has to reproduce.
Prepare the base before inviting your child
Fold a sheet of paper in half. From the folded edge, an adult cuts a few parallel slits, stopping well before the opposite edge so that a border remains intact. Open the sheet to make the weaving base. Cut a second sheet into strips narrow enough to pass through the slits comfortably. The measurements do not have to be exact; a short test with one strip will show whether the pieces fit.
For a first attempt, make fewer slits and wider strips. If the base tears or a strip catches, pause and adjust the materials. That is a setup problem to solve together, not a reason to ask for a neater result.
Show one movement, then give the choice back
Demonstrate passing a strip over one section of the base and under the next. Leave enough of the strip showing at both sides to hold it easily. Offer the child a turn, or ask whether they would rather watch another movement first. They may want to choose the colours while you help thread the paper.
To make a conventional woven pattern, the next strip starts the opposite way: under where the first strip went over. You can show that difference without turning the activity into a test. If the child repeats the same route, changes direction or decides to draw on a strip instead, notice the choice before suggesting a correction.
Let the unfinished edges belong
Loose ends and uneven spacing can remain part of the piece. Sliding the strips closer together is an option, not a requirement. If the child wants the weaving to stay in place, an adult can help attach the ends with a little tape. Ask before trimming edges or making changes to something they consider finished.
Try a simple observation such as, “I can see the yellow going underneath here.” Then leave room for an answer. There is no need to name a skill, set a speed target or turn every choice into a lesson.
Offer a smaller version or a different next step
If threading feels frustrating, use a base with just two or three openings, hold the base steady or take turns with one strip. If the invitation has run its course, stop. Another day, the woven paper could become a background for a drawing, a little colour study or a piece to display as it is. Let that next use be a new choice.
For another gentle observation activity, try one object, three views. You can also browse the current Tinker & Twirl collection for more creative-play starting points. Check the description and preview of any edition before choosing it.